Abnormal programming at CppCon2017

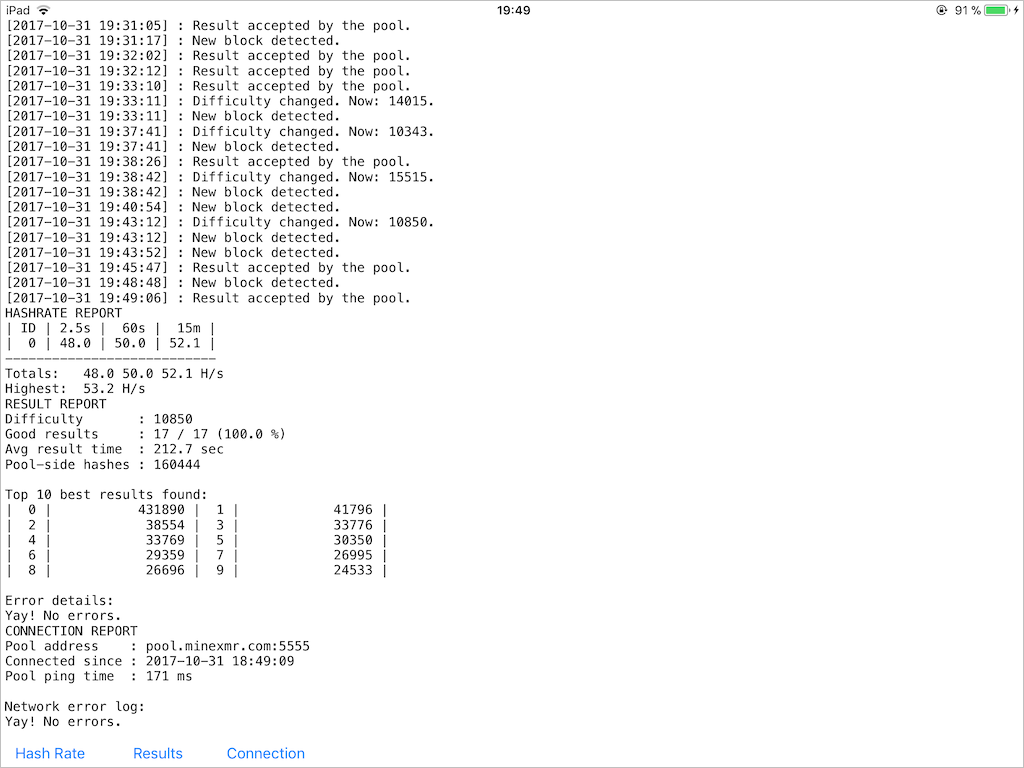
During last CppCon, a set of C++ puzzles was presented within the SCM Challenge (thanks for an iPad BTW). While most of those puzzles were quite generic and simple, one puzzle did really stand out. The one I’m mentioning here was called “Don’t Repeat Yourself” and was introduced by Arthur O’Dwyer.

Here is problem statement:
Write a program that prints the numbers from 1 to N, then back down to 1, separated by whitespace. But Don’t Repeat Yourself: each word in your submitted source code must be unique! A “word” is defined as in Part 1. How large of an N can you achieve?

And that is the definition of a “word” from Part 1:
Write a function that returns true if every word in its input is unique. A “word” is defined as any maximal string of consecutive word characters, and a “word character” is defined as a digit, letter, or underscore. For example, the string “5+hello-world 0_9/a7” contains five words, all unique; so your function should return true. The string “abc+abc_+abc” contains three words, of which the first and last are both “abc”, so your function should return false.

This task, harmless at first sight, turns into a ridiculously hard riddle. “Uniqueness” means that it’s not possible to access any identifier – it can only be declared, but never touched again. The same applies to preprocessor statements, language keywords and so forth. Unfortunately, there’s no known “right” solution to this puzzle (at least for me). Arthur showed 3 possible solutions made by CppCon participants, including mine, during his lightning talk, but all those were hacks more or less. One exploited the trick with escape sequences in string literals, another used a plain assembled binary injected into the source code. Mine used the stack hack to get a read-write access to the function parameter.

The clean variant of my solution is shown below. It assumes libstdc++ environment and gcc compiler. Of course, there’s no compatibility with other compilers and/or standard libraries. A few notes on the solution:
– Optimization is turned off by a compiler-specific pragma to get access to the stack. Parameter passing would be optimized otherwise.
– User-defined literal is used to mimic the function syntax. Otherwise, it would not be possible to call the function.
– The function parameter N is accessed via stack frame address hack and via zero-sized alloca() hack.
– errno is used as another counter variable, thanks to the library-specific alias.

#include <iostream>
using namespace std;
__attribute__((optnone)) void operator "" _print( decltype(0ULL) )
{
    for(; errno <= ((uint64_t*)__builtin_alloca(0L))[3L];) 
        cerr << ++*__errno_location() << " ";
    while( ((int64_t*)__builtin_frame_address(0))[-1L] )
        cout << ((long*)alloca(0LL))[3]-- << " ";
}
int main()
{
    // print numbers up to 500 and back
    500_print;
}

Painless localization of bundles with Xcode

In Cocoa world, NSLocalizedString() is the “official” way to localize a user-facing string data. It has been around for many years, and most of the time this mechanism works pretty well. Even better, it’s possible to use the XLIFF file format throughout a localization process since the release of Xcode 6. The IDE is smart enough to gather string resources defined in source files and to expose them via XLIFF. This support from IDE and external tools makes the localization process mostly smooth for small projects.

The process gets more clumsy when custom tables (other than “Localizable.strings”) or frameworks come into play. At that moment a relatively slender
NSLocalizedString(@”String”, “comment”)
transforms into a
NSLocalizedStringFromTable(@”String”, “Custom”, “comment”)
or, even worse, into a
NSLocalizedStringFromTableInBundle(@”String”, “Localizable”, [NSBundle bundleForClass:[self class]], “comment”).
With this amount of boilerplate code, an SNR drops below 25% and such inclusions make it hard to reason about the functional logic.

Some projects mitigate this issue by introducing another macro on top of existing, but this approach disables an ability of Xcode to gather localizable strings from the source code. During the refactoring of Nimble Commander’s file operations subsystem (i.e. moving a bunch of code into a separate framework), I found it relatively easy to deal with this issue within the Objective-C++ world.

Since NSLocalizedString is a macro, nobody can stop from removing it away via simple #undef. Next, NSLocalizedString can be defined again as a regular function without any preprocessor magic:

// Internal.h
#pragma once
#undef NSLocalizedString
namespace project {
...
NSString *NSLocalizedString(NSString *_key, const char *_comment);
...
}

This small workaround preserves Xcode’s ability to find and extract localizable strings and is syntactically identical to the macro definition, i.e. no changes are required within an existing code. An implementation of redefined NSLocalizedString is pretty straightforward:

// Internal.mm
#include "Internal.h"
namespace project {
...
static NSBundle *Bundle()
{
  static const auto bundle_id = @"com.company.project.framework";
  static const auto bundle = [NSBundle bundleWithIdentifier:bundle_id];
  return bundle;
}

NSString *NSLocalizedString(NSString *_key, const char *_comment)
{
  return [Bundle() localizedStringForKey:_key value:@"" table:@"Localizable"];
}
...
}

Obviously, “Internal.h” must be included only inside the framework’s source code.


CoreFoundation and memory allocators – why bother?

Any seasoned C++ programmer knows that object allocation does cost CPU cycles, and may cost lots of them. The language itself provides various object allocation types. Such mess might surprise folks who use other user-friendlier languages, especially languages with a garbage collection. But that’s only the beginning. Any C++ Jedi knows about custom allocation strategies, such as memory pools,  buddy allocation, grow-only allocators, can write a generic-purpose memory allocator (probably quite a crappy one) and so forth.
Does it help? Sometimes usage of a custom allocator allows tuning up an application’s performance, by exploiting a specific knowledge about properties of the system.
Does it mean that it might be a good idea to write your own malloc() implementation? Absolutely not. It’s a good challenge for educational purposes, but almost never this will bring any performance benefits.

So what about Cocoa in this aspect?

On Foundation level, Objective-C once had some options to customize the allocation process via NSZone, but they were discarded upon a transition to the ARC. Swift, on the other hand, AFAIK doesn’t even pretend to provide any allocation options.

On CoreFoundation level, many APIs accept a pointer to a memory allocator (CFAllocatorRef) as the first parameter. kCFAllocatorDefault or NULL is passed to use the default allocator, i.e. CFAllocatorGetDefault(), i.e. kCFAllocatorSystemDefault in most cases. CoreFoundation also provides a set of APIs to manipulate the allocation process:
– CFAllocatorCreate
– CFAllocatorAllocate
– CFAllocatorReallocate
– CFAllocatorDeallocate
– CFAllocatorGetPreferredSizeForSize
– CFAllocatorGetContext
An overall mechanics around CFAllocatorRef is quite well documented and, even better, it’s always possible to take a look at the source code of CoreFoundation. So, it’s absolutely ok to use a custom memory allocator on the CoreFoundation level.

“What for?” might be a reasonable question here. Introducing any additional low-level components also implies some maintenance burden in the future, so there should be some heavy pros to bother with a custom memory allocation. Traditionally,  the Achilles’ heel of generic-purpose memory allocators is a dealing with many allocations and consequent deallocations of small amounts of memory. There’re plenty of optimization techniques developed for such tasks, so why not check it on Cocoa?

Suppose we want to spend as less time on memory allocation as possible. Nothing is faster than allocating memory on the stack, obviously. But there are some issues with a stack-based allocation:
• The stack is not limitless. A typical program, which does nothing tricky, is very unlikely to hit the stack limit, but that’s not an advice to carelessly use alloca() everywhere – it will strike back eventually.
• Deallocating a stack-based memory in an arbitrary order is painful and requires some time to manage. In a perfect world, however, it would be great to have an O(1) time complexity for both allocation and deallocation.
• All allocated objects must be freed before an escaping out of allocator’s visibility scope, otherwise, an access to the “leaked” object will lead to an undefined behavior.
To mitigate these issues, a compromise strategy exists:
• Use a stack memory when possible, fall back to a generic-purpose memory allocator otherwise.
• Do increase a stack pointer on allocations, don’t decrease it upon deallocations.
In such case, allocations will be blazingly fast most of the time, while it’s still possible to process requests for big memory chunks. As for the third issue, it falls onto the developer, since the memory allocator can only help with some diagnostic. It’s incredibly easy to write such memory allocator, main steps are described below.

The stack-based allocator is conceptually a classic C++ RAII object. It’s assumed that the client source code will be compiled as C++ or as Objective-C++. The only public method, apart from the constructor and the destructor, provides a CFAllocatorRef pointer to pass into CoreFoundation APIs. The internal state of the allocator consists of the stack itself, a stack pointer, two allocations counters for diagnostic purposes and the CFAllocatorRef pointer.

struct CFStackAllocator
{
  CFStackAllocator() noexcept;
  ~CFStackAllocator() noexcept;
  inline CFAllocatorRef Alloc() const noexcept { return m_Alloc; }
private:
... 
  static const int m_Size = 4096 - 16;
  char m_Buffer[m_Size];
  int m_Left;
  short m_StackObjects;
  short m_HeapObjects;
  const CFAllocatorRef m_Alloc;
};

To initialize the object, the constructor fills counters with defaults and creates a CFAllocatorRef frontend. Only two callbacks are required to build a working CFAllocatorRef: CFAllocatorAllocateCallBack and CFAllocatorDeallocateCallBack.

CFStackAllocator::CFStackAllocator() noexcept:
  m_Left(m_Size),
  m_StackObjects(0),
  m_HeapObjects(0),
  m_Alloc(Construct())
{}

CFAllocatorRef CFStackAllocator::Construct() noexcept
{
  CFAllocatorContext context = {
    0,
    this,
    nullptr,
    nullptr,
    nullptr,
    DoAlloc,
    nullptr,
    DoDealloc,
    nullptr
  };
  return CFAllocatorCreate(kCFAllocatorUseContext, &context);
}

To allocate a memory block, it’s only needed to check whether requested block could be placed in the stack buffer. In this case, the allocation process itself consists only of updating the free space counter. Otherwise, the allocation falls back to the generic malloc().

void *CFStackAllocator::DoAlloc
  (CFIndex _alloc_size, CFOptionFlags _hint, void *_info)
{
  auto me = (CFStackAllocator *)_info;
  if( _alloc_size <= me->m_Left ) {
    void *v = me->m_Buffer + m_Size - me->m_Left;
    me->m_Left -= _alloc_size;
    me->m_StackObjects++;
    return v;
  }
  else {
    me->m_HeapObjects++;
    return malloc(_alloc_size);
  }
}

To deallocate a previously allocated memory block, it’s only needed to check whether that allocation was dispatched to the malloc() and to call free() accordingly.

void CFStackAllocator::DoDealloc(void *_ptr, void *_info)
{
  auto me = (CFStackAllocator *)_info;
  if( _ptr < me->m_Buffer || _ptr >= me->m_Buffer + m_Size ) {
    free(_ptr);
    me->m_HeapObjects--;
  }
  else {
    me->m_StackObjects--;
  }
}

To measure the performance difference between a default Objective-C allocator, a default CoreFoundation allocator and the CFStackAllocator, the following task was executed:
Given N UTF-8 strings, calculate hash values of derived strings which are lowercase and normalized.

An Objective-C variant of the computation:

unsigned long Hash_NSString( const vector<string> &_data )
{
  unsigned long hash = 0;
  @autoreleasepool {
    for( const auto &s: _data ) {
      const auto nsstring = [[NSString alloc] initWithBytes:s.data()
                                                     length:s.length()
                                                   encoding:NSUTF8StringEncoding];
      hash += nsstring.lowercaseString.decomposedStringWithCanonicalMapping.hash;
    }
  }
  return hash;
}

A CoreFoundation counterpart of this task:

unsigned long Hash_CFString( const vector<string> &_data )
{
  unsigned long hash = 0;
  const auto locale = CFLocaleCopyCurrent();
  for( const auto &s: _data ) {
    const auto cfstring = CFStringCreateWithBytes(0,
                                                  (UInt8*)s.data(),
                                                  s.length(),
                                                  kCFStringEncodingUTF8,
                                                  false);
    const auto cfmstring = CFStringCreateMutableCopy(0, 0, cfstring);
    CFStringLowercase(cfmstring, locale);
    CFStringNormalize(cfmstring, kCFStringNormalizationFormD);
    hash += CFHash(cfmstring);
    CFRelease(cfmstring);
    CFRelease(cfstring);
  }
  CFRelease(locale);
  return hash;
}

A CoreFoundation counterpart using a stack-based memory allocation:

unsigned long Hash_CFString_SA( const vector<string> &_data )
{
  unsigned long hash = 0;
  const auto locale = CFLocaleCopyCurrent();
  for( const auto &s: _data ) {
    CFStackAllocator alloc;
    const auto cfstring = CFStringCreateWithBytes(alloc.Alloc(),
                                                  (UInt8*)s.data(),
                                                  s.length(),
                                                  kCFStringEncodingUTF8,
                                                  false);
    const auto cfmstring = CFStringCreateMutableCopy(alloc.Alloc(), 0, cfstring);
    CFStringLowercase(cfmstring, locale);
    CFStringNormalize(cfmstring, kCFStringNormalizationFormD);
    hash += CFHash(cfmstring);
    CFRelease(cfmstring);
    CFRelease(cfstring);
  }
  CFRelease(locale);
  return hash;
}

And here are the results. These functions were called with the same data set consisting of 1,000,000 randomly generated strings with varying lengths.

On the provided data sets range, the CoreFoundation+CFStackAllocator implementation variant is 20%-50% faster than the pure Objective-C implementation and is 7%-20% faster than the pure CoreFoundation implementation. It’s easy to observe that Δ between timings is almost constant and represents the difference between times spent in the management tasks. To be precise, the time spent in management tasks in the CoreFoundation+CFStackAllocator variant is ~800ms less than in the Objective-C variant and is ~270ms less than in the pure CoreFoundation variant. Divided by the strings amount, this Δ is ~800ns and ~270ns per string accordingly.
The stack-based memory allocation is a micro-optimization, of course, but it might be very useful in a time-critical execution path. The complete source code of the CFStackAllocator and of the benchmarking is available in this repository: https://github.com/mikekazakov/CFStackAllocator.

Hacking NSMenu keyboard navigation

AppKit’s menu subsystem is perhaps one of the most rigid and monolithic components in Cocoa. While it has a quite clear API, it contradicts with many idioms assumed in Cocoa, especially regarding customization support.

NSMenu subsystem provides, basically, two major customization points:

  • You can set your NSMenuDelegate implementation to update a structure of a specific menu instance. All NSMenuDelegate’s hooks are called before the menu is displayed.
  • You can put a custom view inside some NSMenuItem element to present a non-regular or an area-specific type of information. Microsoft Office for Mac, for example, has loads of such custom menu elements.

Apart from these points, you can’t control the menu’s behavior. Apparently, there’re some good reasons for that rigidity. A lot of under-the-hood work is done without even bothering on the app side, for instance: a Help->Search functionality triggered via Cmd+Shift+? hotkey. Or, generally speaking, it’s an example of a principle of least user astonishment in action.

What if, however, you want to slightly alter a default routine of input processing? The universal answer is – “then go and write your own implementation from the scratch”. This WWDC session contains more details: “Key Event Handling in Cocoa Applications“. Of course, writing an additional UI component with several KSLoCs might be an entertaining adventure, but polishing every detail of such generic metaphor can easily eat up weeks of work. And, it turns out, usually, there are more important tasks to do.

In my specific case, I wanted to optimize a keyboard navigation of one particular UX pattern in Nimble Commander. It provides hotkeys to show popup menus with various places to navigate go, like favorite locations, mounted volumes, network connections etc. After such popup menu has been shown, a user can choose an appropriate location via arrows keys or via mouse. NC also sets up hotkeys for the first 12 elements: [0, 1, …, 0, -, =]. So, for short lists everything is fine, and a required location can be chosen with two keystrokes – first to pop up a menu and second to trigger a menu item. Longer lists, however, can become hard to navigate, since a required item can be accessed only with key arrows. Yes, there’s some basic letter-based navigation implemented in menus, but it’s absolutely rudimentary and won’t help much. What I wanted was plain and simple – to drop a few letters in the menu and to show only items which contain this substring in their titles. Something similar to this:

No googling gave me any hints on possible approaches to intercepting of NSMenu input. Cocoa’s menu subsystem doesn’t use a regular NSWindow/NSView event routing, so usual hooks can’t be applied in this situation. [NSEvent addLocalMonitorForEventsMatchingMask: handler:] doesn’t do a thing – there’s simply no NSEvent object to process. Perhaps [NSEvent addGlobalMonitorForEventsMatchingMask: handler:] could work, but it’s too heavy to use in a mere UI element.
What else? Anyone who debugged their code after it was called by a menu item, might have noticed that a call stack was full of identifiers containing a word “Carbon”. While a majority of Carbon API was marked as “deprecated” years ago, the menu subsystem still heavily relies on that code.
Well, that’s something at least. Luckily, an event-processing part of Carbon is still available and even wasn’t marked as “deprecated”.

So, with that tested and confirmed, it’s possible to switch to an actual “hack” implementation. Here’re the steps to intercept an incoming NSMenu event:
1. Make a custom menu.
2. Put there an element with a custom view inside.
3. Override the [NSView viewDidMoveToWindow] method on that custom view.
4. Retrieve current Carbon event dispatcher via GetEventDispatcherTarget().
5. Install a new event handler for an appropriate event kind via InstallEventHandler().

Here’s the code snippet (Objective-C++):

- (void) viewDidMoveToWindow
{
  [super viewDidMoveToWindow];

  if( m_EventHandler != nullptr ) {
    RemoveEventHandler(m_EventHandler);
    m_EventHandler = nullptr;
  }

  if( const auto window = self.window ) {
    if( ![window.className isEqualToString:@"NSCarbonMenuWindow"] ) {
      NSLog(@"Sorry, but MGKMenuWithFilter was designed to work with NSCarbonMenuWindow.");
      return;
    }
 
    const auto dispatcher = GetEventDispatcherTarget();
    if( !dispatcher ) {
      NSLog(@"GetEventDispatcherTarget() failed");
      return;
    }

    EventTypeSpec evts[2];
    evts[0].eventClass = kEventClassKeyboard;
    evts[0].eventKind = kEventRawKeyDown;
    evts[1].eventClass = kEventClassKeyboard;
    evts[1].eventKind = kEventRawKeyRepeat;
    const auto result = InstallEventHandler(dispatcher,
                                            CarbonCallback,
                                            2,
                                            &evts[0],
                                            (__bridge void*)self,
                                            &m_EventHandler);
    if( result != noErr ) {
      NSLog(@"InstallEventHandler() failed");
    }
  }
}

At this point, most of the keyboard events are passed to the custom Carbon callback, except for previously set key equivalents. The callback can convey these events onto the custom processing, and if an event wasn’t processed there, it can be sent back to default route:

static OSStatus CarbonCallback(EventHandlerCallRef _handler,
                               EventRef _event,
                               void *_user_data)
{
  if( !_event || !_user_data )
    return noErr;

  const auto menu_item = (__bridge MGKFilterMenuItem*)_user_data;
 
  const auto processed = [menu_item processInterceptedEvent:_event];
 
  if( processed )
    return noErr;
  else
    return CallNextEventHandler( _handler, _event );
}

It’s possible to convert EventRef into an NSEvent object with the following initializer: [NSEvent eventWithEventRef:]. Once NSEvent is received, any appropriate handling can be applied. In the current implementation, the top menu item contains an NSTextField view with a search criteria, which is shown only when some filter was entered. After a string inside this text field is updated, control is handed to the menu object so it can hide or show matching items, this process is quite straightforward. There are some details worth mentioning here:

  • It’s quite convenient to automatically select the first matching menu item after applying a filter if there was no selection before. NSMenu does not provide such interface, but it can be added with another dirty hack:
- (void) higlightCustomItem:(NSMenuItem*)_item
{
  static const auto selHighlightItem = NSSelectorFromString(@"highlightItem:");
  static const auto hack_works = (bool)[self respondsToSelector:selHighlightItem];
  if( hack_works ) {
#pragma clang diagnostic push
#pragma clang diagnostic ignored "-Warc-performSelector-leaks"
    [self performSelector:selHighlightItem withObject:_item];
#pragma clang diagnostic pop
  }
}


  • After a filter was applied, any previously set key equivalents must be cleared and vice versa. Otherwise, they can be unintentionally triggered instead of altering criteria for filtering.
  • These hacks are quite dirty and basically, nothing guarantees that they won’t stop working at any moment in the future. If (or when) an underlying NSMenu’s infrastructure will change radically, MGKMenuWithFilter will gracefully fall back to a regular menu behavior. At this moment, however, this infrastructure seems to be pretty stable and hasn’t got major changes for years.
    Current hack compatibility at the moment:
    macOS 10.12 “Sierra” – works
    OS X 10.11 “El Capitan” – works
    OS X 10.10 “Yosemite” – works
    OS X 10.9 “Mavericks” – works
    OS X 10.8 “Mountain Lion” – works
    Mac OS X 10.7 “Lion” – works partially, there’s no [NSMenu highlightItem:]
  • Current implementation assumes a programmatic approach of populating a menu, but with minor changes, it can be extended to support NIB-based menus made in Interface Builder as well.

The source code is available in this repository.
It also includes example projects written in Swift, Objective-C and a project in Objective-C for pre-Yosemite versions of MacOSX.